|
Looking to record guitars with Studio One by PreSonus? Excellent choice! I love Studio One.
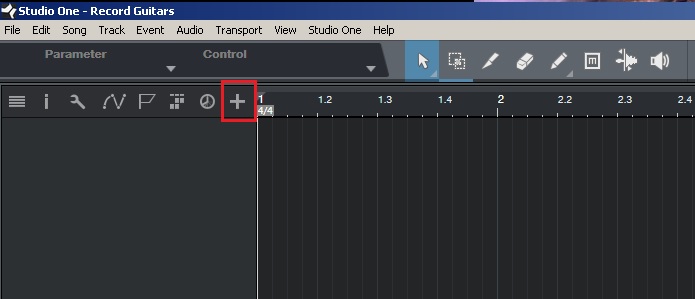
First thing you're going to need is an interface. You have to have something to pick up your playing, whether it's from a mic or by directly plugging your guitar into the interface. I use the PreSonus Firebox (which is no longer being made), but you can use any interface you really want. Yes, the more you spend will typically lead to better recording quality. CLICK HERE to check out some different interfaces. Once you have your interface installed and ready to go, open up Studio One. After you've opened Studio One and started a new song, there are a few ways to create a track to begin recording guitars. First, you can click on the plus sign in the upper left portion of Studio One to open a new track.
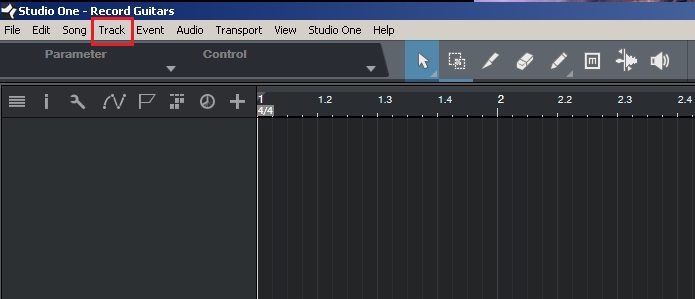
You can also click on "Track" up in the menu area.
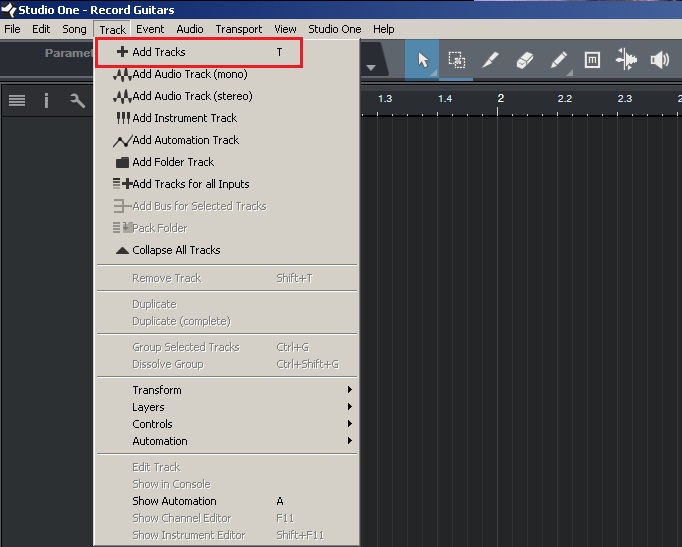
Clicking on "Track" will present a drop down menu where you will select "Add Tracks"
Or, you can just hit the letter "T" on your keyboard to start the new track.
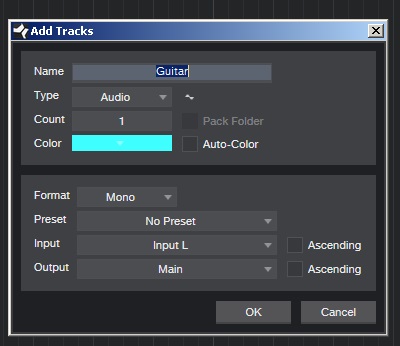
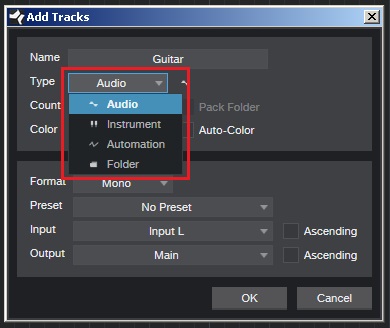
Once you've followed either of those options to start a new track, you'll be presented with a window giving you some options.
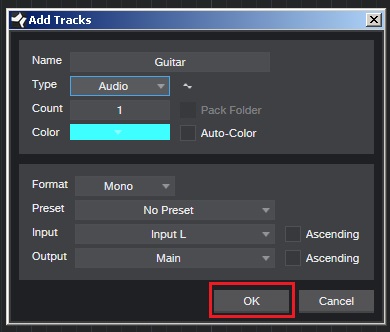
Some of the options you'll need to select can be determined by the type of interface you have, and which input you've used to plug in your microphone or guitar.
It's important that you have "Audio" selected in the "Type" option.
Once you have your options set correctly, click on OK
Now, you should have a track with which you can begin recording your guitar. You can also change your input/audio options even after you've completed the previous step.
To change your input/audio options click on the areas in the red boxes shown in the next picture.
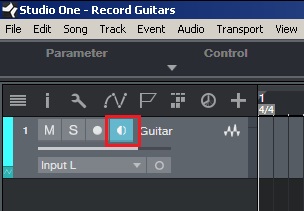
In order to hear your guitar you'll need to click on the "monitor" icon. When it's selected it will be highlighted so you know it's on.
If you can't hear your guitar playing when you strum the strings you may need to change your input/audio settings. If changing those don't work, you may have to double check the installation of your interface. You can check the help manual in Studio One for troubleshooting this if necessary.
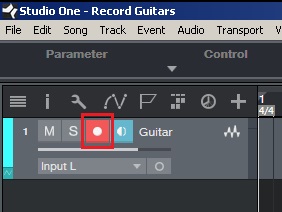
The next thing to do is click on the "record" icon to enable recording to the track you've just created. It will be highlighted when that button has been activated.
You're ready to start recording! You can now click on "record" at the bottom of Studio One
If you hover your mouse over "record" a small window will pop up telling you what your keyboard shortcut is to start recording. This is what it looks like for me:
Once you hit "record" or hit your keyboard shortcut to begin recording, start playing!
If you've done everything correct, you'll see "record" and "play" both highlighted at the same time while you're recording.
When you're ready to stop recording, just hit your space bar, or click on "stop"
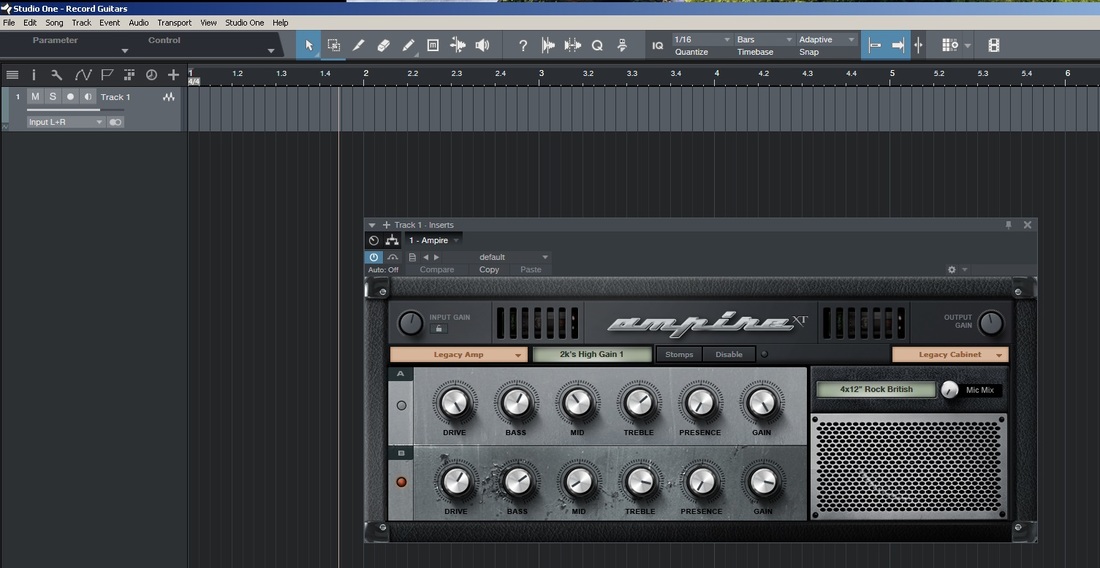
Another option you have to start recording guitars is to use amp simulation software. Ampire is what comes with Studio One, but you can also use 3rd party plug-ins you purchase.
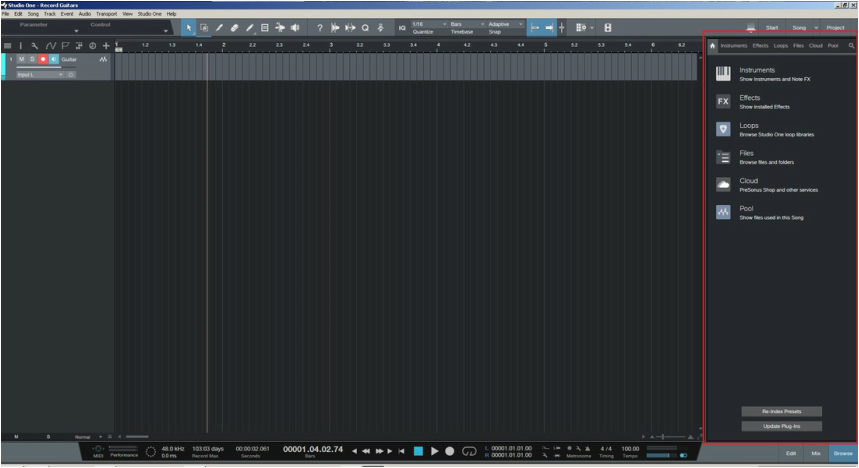
The easiest way to add a track for recording guitar if you're going to use amp simulation software is to use the drag and drop feature. First, go over the browse menu.
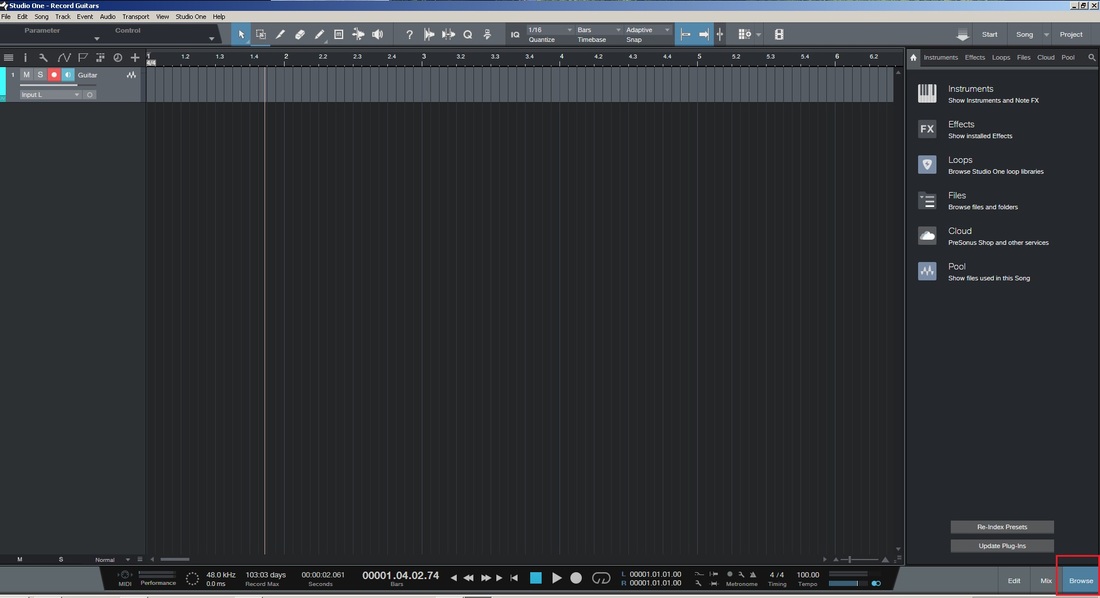
If you do not see this menu you will need to click on "Browse" in the bottom right corner of Studio One.
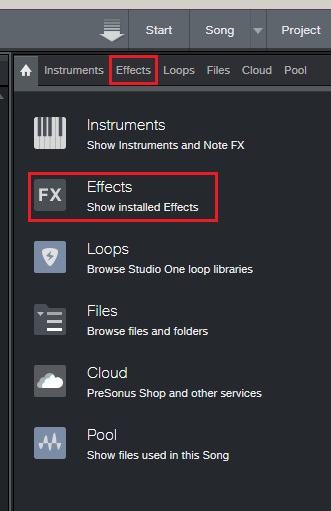
Next, click on "Effects" either in the list currently shown, or in the different folders shown at the top of the browse menu.
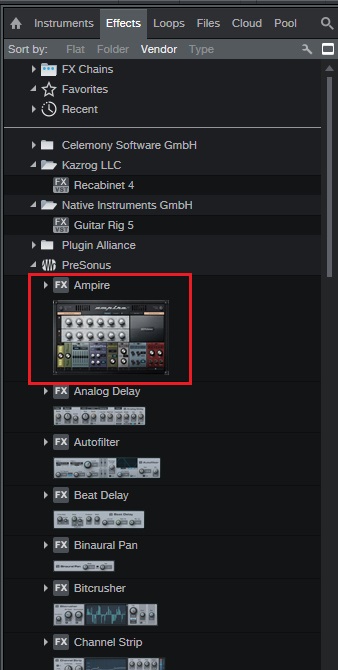
Now, click on the plug-in you wish to use, and hold down the mouse button. I'll use Ampire for this example.
Now, move your mouse over to the track area while still holding down your mouse button. In other words, drag the plug-in over to the track area. Once you're there, just let go of the mouse button and you'll have a new track pop up!
That's it! That's how you start recording guitars in Studio One. Have fun creating!
12 Comments
|
Available Instruction Courses
|
- Metal and Rock Guitar Lessons
- Reach Your Fastest Speeds
-
Menu
- Skype Lessons
- Sign Up for Skype Guitar Lessons
- Video Correspondence Lessons
- Sign Up for Video Correspondence Lessons
- FREE Lessons for a WEEK >
- Free Tabs
- Get TWO FREE eBooks
- Rates
- Instruction Courses >
- Video Feedback Lessons
- Contact
- Blog (LOTS of Free Lessons)
- Student Testimonies
- Backing Tracks
- Store
IN DEPTH
|
|










 RSS Feed